Monday, May 22, 2017

Pouches

Facebook is the new e-commerce hub, apparently!
Anyhow, I have always wanted to take my work one step ahead by making it for others besides family/friends (maybe even for a small charge) but I was never confident about it.

Then suddenly one day, I saw this post on a local Facebook page asking for baby memory quilts. There I thought was my best opportunity! I reached out to that person and shared my blog with her. She was quite impressed (I know right!) and made me 2 offers - one for the memory quilt and another for pouches to gift her relatives and friends back home.

Could I be more excited?!! :)

So there I began working on my very first order. The good thing was that she had given me all the materials - batting, clothes, buttons and zippers. She asked me to make sunglasses pouches, cosmetic pouches and flap pouches - five of each.

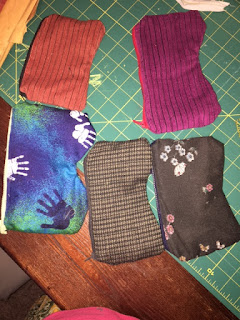
 

The pouches were adjusted to fit the zipper size so they don't all look uniform.


PS: No particular pattern was followed, I made them purely based on prior knowledge :)

Saturday, April 8, 2017

Its Knitting time!

On a snowy cold weather when the whole city is quiet,  most people want to curl up under their blankets beside their loved ones and listen to the silent snowfall. But then there are some others, like me, who want to knit :) - just perfect for the weather!!

I saw many posts on facebook about how people love to knit sweater, hats, socks, booties etc. during the winter season and realised how cool it would be if I could make some for my family. 

The thing I really like about the local community is that they are extremely generous with their time and are always ready to help. That's how I found this amazing knitting group who volunteered to help new knitters learn. 
Thus with the guidance of a wonderful lady - Gerri, I started on my first ever knitting project - A hat for my daughter (followed by one for myself).


The hat was such a hit among my friends & relatives that I was bombarded with requests for hats with earflaps. So with the help of multiple patterns from ravelry.com and youtube tutorials, I made 4 hats with earflaps (2 of each).


Then one day, I suddenly realised I needed a break from hats and started widening my knitting skills to try some booties & socks (again made 2 of each but since they were all gifted I forgot to take pictures before giving them away) 


There are many great patterns all over the internet for hats and socks. But here are a few I followed : 

http://onehookandtwoneedles.blogspot.com/2016/03/0-3-month-booties-beginners-knitted.html
https://www.youtube.com/watch?v=rqbY6IIXTgA
https://www.youtube.com/watch?v=Z72LfwSDWlM&t=1106s

Like always, I added my own ideas and tweaked the patterns here and there to make it more colourful/different (and to learn different stiches :))

Currently, Gerri is helping with my ongoing project - a sweater for myself - and since its a HUGE one, I will update the blog with pictures and patterns once it's finished (I can't wait!!) - which will be a few months at the least!


Sunday, December 25, 2016

Ipad / messenger bag

Its the end of 2016!

Besides sewing, I've also started to learn to knit (the perfect thing to do in this season). Not only is knitting interesting,  but its also extremely relaxing :) Theres this local facebook group for knitters where many members were willing to teach those who were interested to learn. Thats how I met Gerri who taught me how to knit the first ever hat for my daughter (and oh, I also made another one with a different pattern for myself :) (can be found on my knitting post))

But my knitting venture has nothing to do with this post. 
Whenever I met Gerri for my classes she used to bring along this very cute messenger bag to carry her Surface in. While I used my phone to read patterns, it was extremely cumbersome to navigate between multiple pdfs. Therefore, like her, I too wanted to carry along a tablet for my next sessions (instead of a laptop, it was just lighter to carry the tablet around). So I made one :)

Since we eat a lot of rice there are empty rice bags always lying around our home. We usually donate the bags but this time I turned it into my iPad bag's lining and used the zip for the second pocket on the bag. Here are the materials I used:


The pattern is very similar to my other bags in the blog. This one was much easier to work on because I did not have to fuse any interfacing on the back side as the rice bag was thick enough. However, I did fuse some interfacing on the front side because of the second zipper. 

The strap was saved from another bag that was given away; I just couldn't find a better way to recycle it :) 

PS: Like I always mention on all my posts, there are multiple tutorials on Pinterest & Youtube for an iPad/messenger bag, however, I did not follow any for this one.


Saturday, October 15, 2016

Hair Clip Organiser

Usually with girl children, they want to dress up and wear matching accessories :) So when my parents were coming over to visit us I had asked my mom to bring a lot of hair clips. But the thing with having so many accessories is that you just cant locate them when you need.. especially when your kid's late to school! I was having a very difficult time to pick an almost matching hair clip every single day because they were all in the same bowl and all mixed up.


Then I remembered having made a small organiser for my neighbour's daughter in Bangalore. 


So I decided to end the misery by making another organiser for my daughter's clips. I was initially looking to buy it off because I was unable to sew/DIY since I started working. But after seeing so many posts on Pinterest I realised its easier to make than spend $15 on a professionally made one.

One weekend I took my parents to a nearby mall where we went to Michaels to buy some beads.. there we saw very cheap ribbons for just a dollar :) So I bought a couple and sewed them together and included a zillion partitions to hold all her zillion clips. 


I bought the J monogram in Michaels too and the roses were from an old hair band that had snapped. 

Now, this is what it looks like :) 


Monday, July 25, 2016

Tshirt to Pyjama

One of my brother's friends owns a garment factory outlet. The store mainly stocks sports clothing, amongst others, made of bamboo cotton which keeps you cool during summers and warm during winters. Sadly, the store holds clothes only for adults and nothing for kids. 
So last year, before moving here we decided to buy a couple of bamboo cotton clothes to wear at home. The cloth is super soft and my husband fell in love with it right away. 

Over the past year the only full-arm t-shirt he bought had become tight (ahem.. not because the t-shirt shrunk!). However, he was still not done with having it around so I decided to make a pyjama for my daughter - this way the t-shirt would still be in the family :) 

After watching few videos and tutorials on Youtube and Pinterest I ended up with my first pyjamas for my daughter:


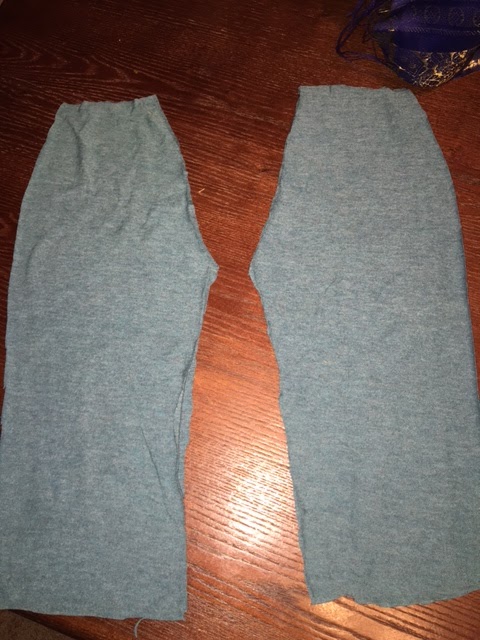
I traced out an existing pyjama pants as pattern and cut 2 pieces of the tshirt. 


I sew up the sides together by inserting one leg piece right-side out into the other leg piece wrong side out and then turned the attached pieces wrong side out.


After that I attached the elastic to the waist area. And I ended up with this:


In the picture, the pant looks like capris because a small portion of the material was stuck in her crotch (which I noticed only after uploading the picture).


Monday, July 4, 2016

Frock from an old shirt

After a few months break, I am back to sewing! The first half of the year was very eventful for our family but now things have started to settle down and we are back to our routines!

Since summer has officially begun in this part of the country, my husband and I got to cleaning our wardrobe last weekend. There were so many clothes he wanted to get rid off/donate. And off the lot, there was this shirt (10 years old that I gifted him for our engagement) and I thought to try and convert it into a frock for my little one. And as usual, I found some great tutorials on pinterest and youtube..

This is what I had:


I traced one of my daughter's old frocks; the picture above shows it vaguely. While cutting it, you want to fold the shirt into half and then cut on one side, this makes both sides even.


I hemmed the bottom, hands and neck. Maybe I should have added a pocket or two but oh well! I might just applique a picture onto it sometime later :)

Sunday, March 13, 2016

Zippered Handbag

We had recently bought a white coloured Poang chair from Ikea; since my daughter loves to dirty furniture at home, we were sure the chair wouldn't retain its colour for too long.... And so I wanted to make a dark chair cover for it but was completely out of cloth.

Coincidentally my inlaws are visiting us from India and we told them to get a few yards of cloths for my sewing projects. The Poang chair took up more than two thirds of the cloth they bought and I was wondering what the remaining could be used for.

That's when I remembered I've always wanted to try making a zippered handbag.. As usual, I went onto Pinterest.com and pulled out some real great tutorials for making a zippered bag.


I put in my own version of pockets in the front, back and inside of the bag. 


The front pockets can hold a water bottle and/or sunglasses or lenses and the inside pockets can hold a phone, a couple of pens or make up stuff and a place to hang keys :)